
You have no items in your shopping cart.

To stop a shower door leaking at bottom, find where water first escapes, then repair the matching problem: a damaged bottom sweep, blocked track drainage, a failed stationary joint, or poor door alignment. Do not caulk the moving bottom edge or block drainage openings. A replacement seal will not fix water running outward across a poorly sloped threshold.
Start with a dry enclosure and isolate the leak before you buy anything. The shower door sweeps and seals comparison explains the distinction between bottom-edge and other enclosure seals.
Use this sequence for a 2026 repair, whether the enclosure is older or recently installed:
If water appears outside while the door stays dry, investigate the threshold, fixed-panel joints, or shower construction rather than assuming the bottom sweep is responsible.
Water on the bathroom floor creates a slipping hazard. Repeated wetting also warrants checking nearby finishes for damage instead of treating the puddle as a routine cleanup task.
The location of the puddle is not necessarily the location of the leak. Water can travel along a track or threshold before reaching the floor. Your first job is to find the entry point into that path, not cover its final exit with silicone.
A bottom leak describes a symptom, not a specific failed part. Use the table to separate repairs that address different water paths.
| Repair option | Best for | Benefit | Limitation |
|---|---|---|---|
| Frameless Door Sweep | A damaged bottom seal on a compatible frameless door | Replaces the flexible bottom-edge seal | Requires the correct glass thickness, profile, and clearance; cannot correct threshold slope |
| Track cleaning | Visible debris obstructing designed drainage | Restores an existing drainage path | Does not repair cracked joints or misalignment |
| Stationary-joint resealing | A confirmed failure at a joint designated for sealant | Repairs that specific water path | Incorrect placement can obstruct drainage; cure instructions apply |
| Professional adjustment | A door that sags, rubs, or closes unevenly | Addresses door position rather than disguising the gap | Cannot resolve an underlying shower-pan or waterproofing defect |
| Threshold or shower-base assessment | Water traveling outward independently of the door seal | Investigates the surface carrying water outside | Can require work beyond the enclosure itself |
Do not stack these repairs indiscriminately. Change the item supported by your inspection, then test again so you know whether the repair worked.
Replace a sweep when its flexible edge is split, curled, hardened, detached, or no longer making the intended contact. First confirm that the door closes correctly; a new sweep forced across an uneven gap can drag or fold instead of directing water inward.
The Showerdoor Frameless Door Sweep is a polycarbonate bottom seal offered for 1/4-inch, 3/8-inch, and 1/2-inch glass. Those measurements describe glass thickness, not the gap beneath the door. Match the actual glass and seal profile rather than choosing by appearance alone.
Before removing the old sweep, photograph its position and cross-section. Record which way its deflector faces, how the attachment channel grips the glass, and how its ends meet neighboring seals.
A sweep must work with the door's intended movement. Do not assume that a longer flexible fin provides a better seal: excessive contact can make the door difficult to close or pull the sweep out of position.
Compare the replacement with the existing installation and the manufacturer's instructions. Confirm glass thickness, attachment style, bottom clearance, deflector orientation, and end clearance before cutting or installing anything.
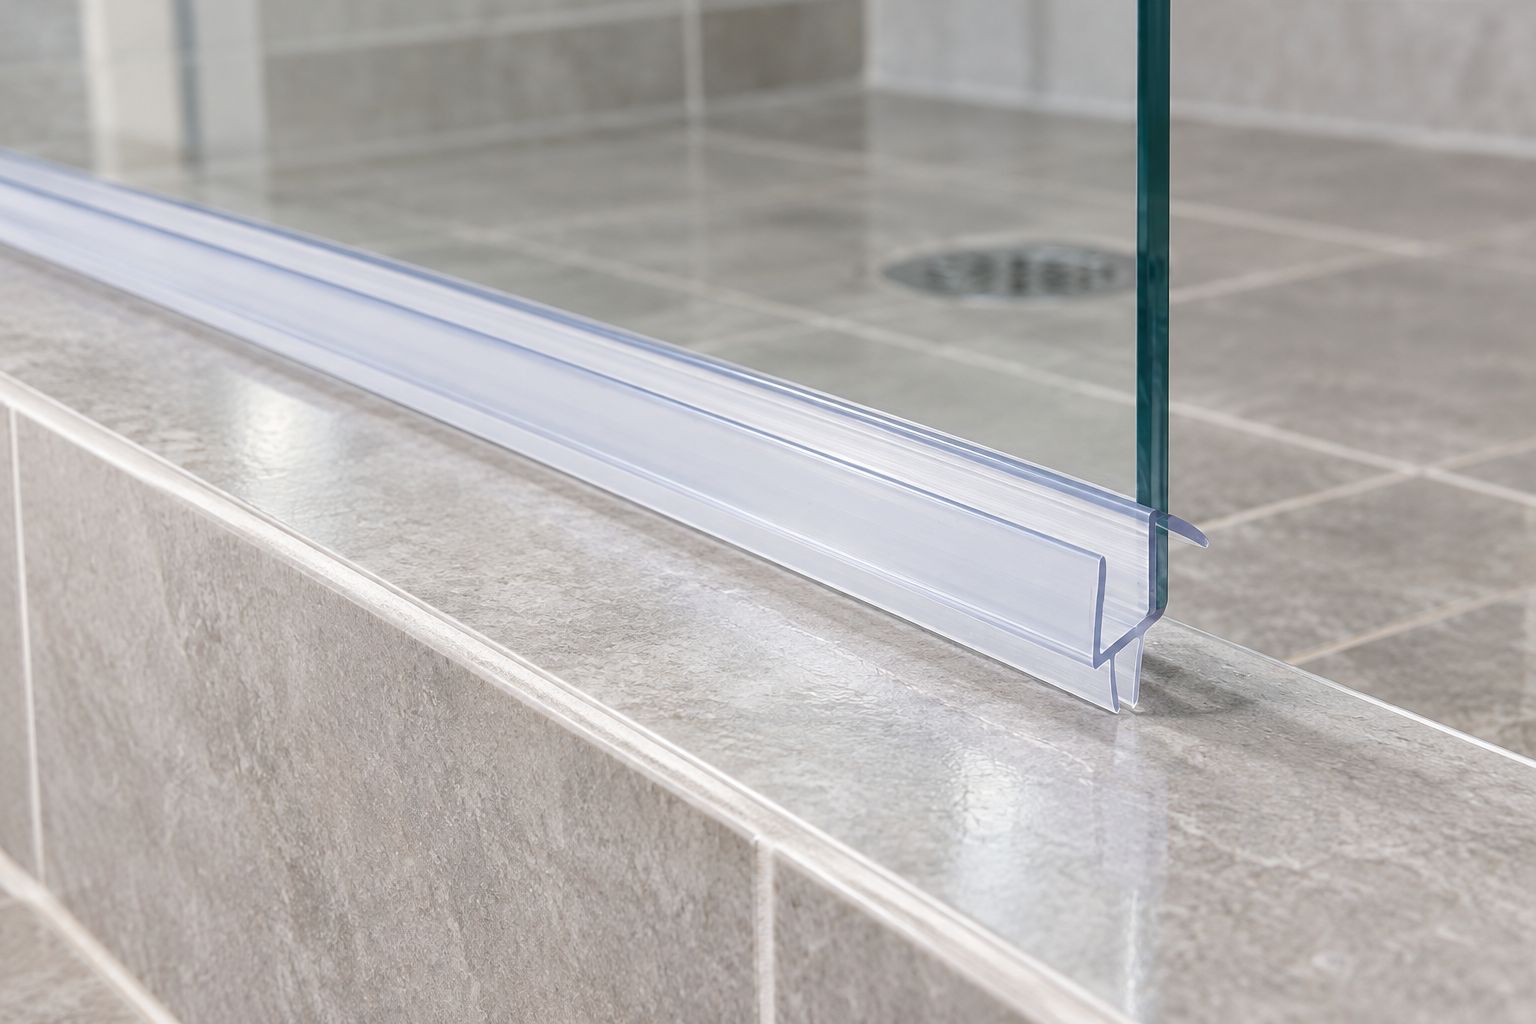
Follow the replacement part's instructions for removal, cleaning, trimming, and attachment. Do not pry against the glass with metal tools, strike the glass edge, or remove hinges to make a sweep fit.
Clean the attachment area using a method approved for the enclosure and its glass treatment. Once the replacement is installed, move the door slowly through its normal travel before testing with water. Stop if the sweep catches or the glass contacts a hard surface.
The right repair depends on how the enclosure manages water. These factors determine whether a sweep replacement is enough:
For a 2026 replacement, identify the enclosure and its installation instructions before selecting materials. A generic repair video does not establish where your particular frame should be sealed.
Use silicone only at a stationary joint where the enclosure instructions call for it. Do not glue a moving door shut, fill the operating gap beneath the glass, or seal visible track openings merely because water passes through them.
The advantage of resealing is precise: it can repair a confirmed failed sealant joint. The drawback is equally specific: sealant placed in the wrong location can interfere with drainage and leave the actual cause untouched.
Look for separation, missing material, or a visible water path at the stationary joint. Remove and replace failed sealant according to the enclosure and sealant instructions rather than spreading another layer over a dirty, wet surface.
Use a sealant compatible with the adjoining materials. Keep the shower out of use for the full cure period stated on that product; a surface that feels dry is not proof that the joint is ready for water.
A drainage problem involves water that enters a designed collection area but does not return to the shower correctly. A seal problem involves water crossing a boundary that the seal is supposed to protect. Observe the route before choosing the repair.
Use the same inspection order each time: Dry surfaces, Inspect closure, Test water, Trace escape, and Retest repair. Check one area at a time so a wet track does not obscure where the water started.
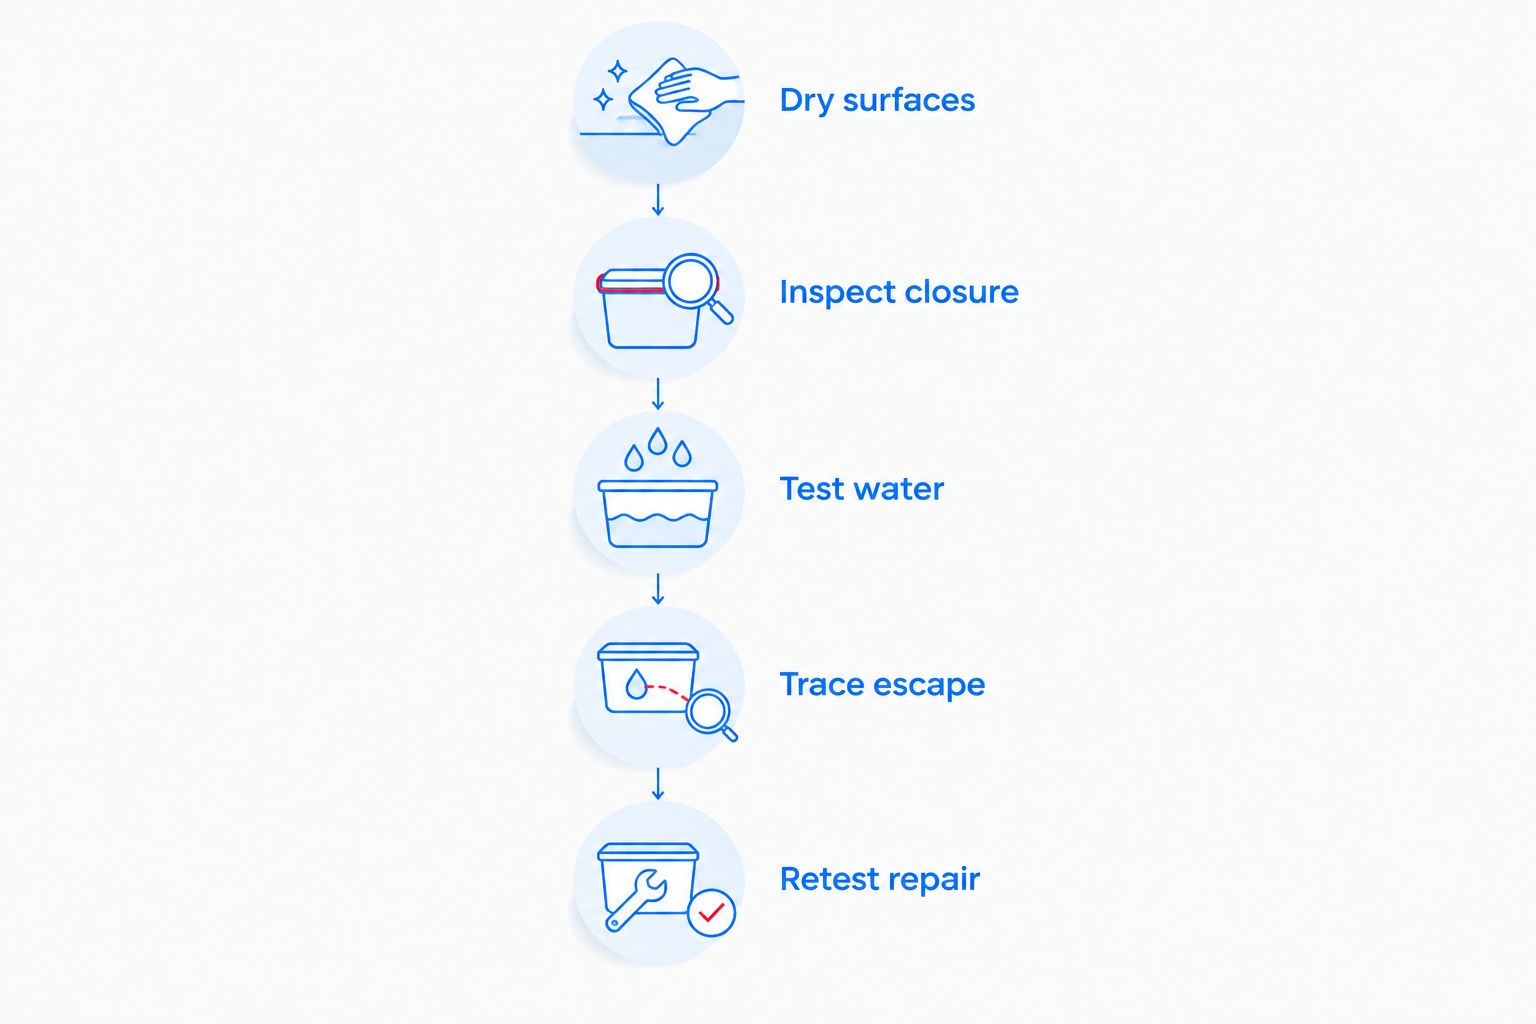
Keep hands and tools away from moving hardware during the test. Do not remove a glass panel to inspect a hidden track, and do not probe drainage openings with anything that can damage the enclosure.
Record the result with a photo for your 2026 maintenance notes. A picture of the first wet joint is more useful to an installer than a picture of the final puddle.
Arrange an assessment when the door sags, hardware moves, glass touches tile, or the door no longer closes as intended. Do not tighten hinges or reposition heavy glass by trial and error.
Also stop routine seal replacement when water escapes with the door dry, the threshold visibly carries water outward, or moisture appears beyond the enclosure. Those observations call for investigation of the surrounding assembly, not another bottom strip.
Showerdoor is best for homeowners in California, Arizona, and Nevada seeking custom shower enclosure manufacturing and installation. That service is relevant when the problem involves enclosure fit or replacement rather than a straightforward compatible-sweep change. Keep shower-base and waterproofing concerns separate from the enclosure repair scope.
Repeat the controlled test with the bathroom floor dry, then check the enclosure during normal shower use. Confirm that the door still operates freely and that water returns inside rather than collecting outside.
Do not judge success only by the absence of an immediate puddle. Check the sweep ends, fixed-panel joints, and floor beside the threshold for fresh moisture. If the leak returns, revisit the water path instead of adding sealant to unrelated areas.
For your 2026 repair record, retain the replacement part identification, glass thickness, and photos of the completed installation. These details make the next maintenance decision easier without assuming every future leak has the same cause.
Why is my shower door leaking at the bottom even with a new seal?
A new bottom seal will not stop a leak caused by poor alignment, blocked drainage, a failed stationary joint, or outward threshold slope. Confirm the replacement profile and trace the first escape point before replacing it again.
Should I caulk under the bottom of my shower door?
Do not caulk the moving bottom edge or block designed drainage openings. Apply sealant only at stationary joints specified by the enclosure instructions.
How do I know which shower door sweep fits?
Match the glass thickness, attachment profile, bottom clearance, and deflector orientation. Showerdoor offers its Frameless Door Sweep for 1/4-inch, 3/8-inch, and 1/2-inch glass; thickness alone does not establish fit.
Can I replace a shower door bottom seal myself?
Replace a removable bottom seal yourself only when the part instructions allow it and the door is stable and undamaged. Leave glass repositioning, loose hinges, and a sagging door to an installer.
Why does water come out of the bottom shower door track?
Water can escape when drainage is obstructed, joints fail, or the enclosure is misaligned. Inspect the drainage path before adding silicone, because sealing an intended opening can interfere with drainage.
Will a longer sweep stop water escaping?
A longer sweep is not automatically a better fit. Excessive contact can cause dragging or folding, so match the intended profile and operating clearance.
What should I photograph before a shower door repair in 2026?
Photograph the first escape point, the closed-door gap, and the existing seal profile. Include visible hardware or threshold concerns so the repair assessment addresses the water path rather than just the puddle.
Water found under the door can originate beside it. Before ordering a sweep, dry the lower corners and watch them during the controlled test. A failed stationary corner joint can send water along the threshold and make an intact bottom seal look responsible.


